In part 1, on Managing SQL Server with PowerShell, I covered some of the basics of getting started using PowerShell with SQL Server. In that article, you saw how to load the sqlps PowerShell Provider as well as how to use the provider to navigate through a SQL Server instance and execute queries against SQL Server. In this article, I’ll pick up where that article left off and you’ll see how to use PowerShell for some common SQL Server management tasks as well as how to execute PowerShell scripts from SQL Agent.
Working with the SQL Server Services
One of the first tasks you may want to learn how to do with PowerShell is start and stop the SQL Server service. Like you might expect this same technique applies to the SQL Agent, SQL Browser and other SQL Server services. First let’s look at using the Get-service command to list all of the available SQL Server services.
Get-service *SQL*
This PowerShell command returns all windows services on the local machine that contains the letters “SQL”. You can use these display names with the start and stop commands shown later in this section.
If you want to see the services that are running you can use the following command
Get-service *SQL* | Where-Object {$_.status -eq "Running
This PowerShell command returns all windows services on the local machine that contains the letters “SQL” and it pipes the output to the Where-Object cmdlet which selects the objects which have the status of “Running”. You can see an example of listing the SQL Server services in Figure 1.

Figure 1 – Listing the SQL Server services with PowerShell

Next, you can use the Start-Service and Stop-Service PowerShell cmdlets to stop and start the SQL Server services. The following listing first stops SQL Server Database engine service and then restarts it using the default service name of MSSQLSERVER.
Stop-Service -Name 'MSSQLSERVER' -FORCE
Start-Service -Name 'MSSQLSERVER'
Setting Server Properties
You can also use PowerShell to configure server and database properties. The following example shows how you can list the available server properties.
Import-Module SQLPS –DisableNameChecking
$server = Get-Item SQLSERVER:\sql\localhost\default

$server.Configuration.Properties
This code first imports the SQLPS module and then creates an object representing the default SQL Server instance and then lists the properties of that server object. You can see the results of running this code in Figure 2.
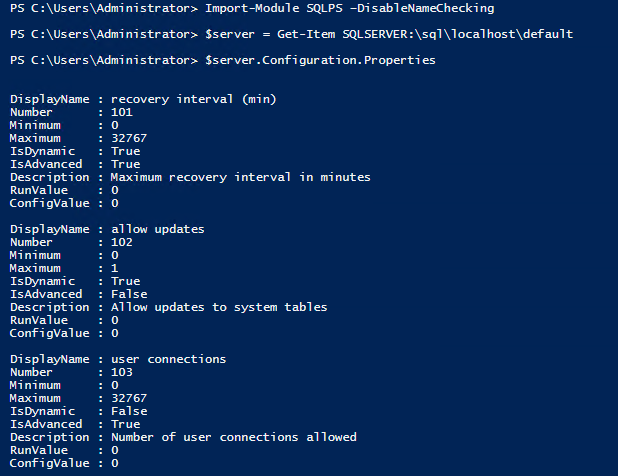 Figure 2 – Listing Server Properties with PowerShell

Backing up Databases
Another common database management task you might want to use PowerShell for is backing up your databases. You can use the Backup-SqlDatabase cmdlet to backup SQL Server databases. The following example illustrates the parameters used by the Backup-SqlDatabase cmdlet.
Backup-SqlDatabase -ServerInstance [Computer\Instance] -Database [Database name]
 -BackupAction Database
The first parameter identifies the server instance to backup. The second parameter specifies the database and the –BackupAction parameter specifies the type of backup that will be performed. The possible values are Database, Files, or Log. The default value if no parameter is included is Database. If you want perform a differential backup you would specify the -BackupAction parameter as Database and then add the -Incremental parameter. You can also force the backups to be compressed by adding the -CompressionOption On parameter. The following example show how you can make a full database backup of the AdvantureWorks2016CTP3 database to the default backup location.
Backup-SqlDatabase -ServerInstance SQL2016-2 -Database Adventureworks2016CTP3 -BackupAction Database
By adding a little logic you can back up all of the user databases on your SQL Server instance. The following script backs up all of the user databases on the SQL Server instance name SQL2016-2 to the default backup location. It gives each backup file the name of the database along with the date and time stamp.
Set-Location SQLSERVER:\SQL\sql2016-2\DEFAULT\Databases
get-childitem|Backup-SqlDatabase
Set-Location SQLSERVER:\SQL\SQL2016-2\DEFAULT\Databases
foreach ($db in (Get-ChildItem))
{
   $dbname = $db.Name
   $dt = Get-Date -Format yyyyMMddHHmmss
   Backup-SqlDatabase -Database $dbname -BackupFile "$($dbname)_db_$($dt).bak"
}
Like you might have guessed the Restore-SqlDatabase cmdlet is used to restore SQL Server databases. The syntax for the Restore-Database cmdlet is shown below.
Restore-SqlDatabase -ServerInstance [Computer\Instance] -Database [Database name]
 -BackupFile [SQL Server backup file]
Much like the Backup-SQLDatabase command, the Restore-Database cmdlet uses the –ServerInstance parameter to identify the server. The –Database parameter to specify the database to be restored and the –BackupFile parameter to point to the SQL Server backup to use for the restore. The following example shows how to restore and replace the AventureWorks2016CTP3 database.
Restore-SqlDatabase -ServerInstance SQL2016-2 -Database AdventureWorks2016CTP3 -BackupFile "C:\Program Files\Microsoft SQL Server\MSSQL13.MSSQLSERVER\MSSQL\Backup\AdventureWorks2016CTP3.bak" -ReplaceDatabase
To restore a transaction log backup you need to use the –RestoreAction Log parameter like you can see in the following listing. The –RestoreAction switch can use the values of Database, Files, or Log.
Restore-SqlDatabase -ServerInstance SQL2016-2 -Database AdventureWorksCTP3 -BackupFile "C:\Program Files\Microsoft SQL Server\MSSQL13.MSSQLSERVER\MSSQL\Backup\AdventureWorks2016CTP3.trn" -RestoreAction Log
You can also use the Backup-ASDatabase and Restore-ASDatabase to backup and restore Analysis Services databases.
Leave a Reply