
The PowerShell Integrated Scripting Environment (ISE) has been my bread and butter for years. As a consultant, it was the most reliable platform to develop any and all Orion® SDK scripts and tools on, as it’s almost universally installed on Windows platforms. However, a new world order is upon us, and the end of my favorite tool is imminent with the development of PowerShell v6, aka PowerShell Core. Enter Visual Studio Code, or “VS Code” for the cool kids, or “code” for the super-ultra-cool kids. Even then, my headstrong nature was not ready to abandon my first ISE love. While I’ve avoided it for some time, my current role is more stable than the hectic life of a consultant, as I can now deploy my servers with my own preferences and am no longer a visitor. This setup, combined with a current need to add more languages to my own personal toolbox, has resulted in a new era on my work laptop and tools server. VS Code has been given a prime piece of real estate as a pinned tile on my Start menu. Following the rabbit even deeper in the hole, I’ve recently added VS Code to my personal Chromebook as well.
While the installation and setup on Windows is well-documented and exceedingly user-friendly, I noticed that the path to installation on Chrome OS was a little scattered. I’d like to take the time to document the primary steps I took, to help anyone else wanting to jump into the wonderful world of Chromebooks as a development tool.
Historically, VS Code was installed via enabling Developer Mode on your Chromebook and installing a Linux distro like Ubuntu via Crouton. Unsupported configurations aside, enabling Developer Mode is inherently less secure than using the default settings, and I’ve never felt comfortable actively pursuing a less secure method in IT. The other approaches used for coding on a Chromebook included less-than-perfect scenarios such as setting up a Raspberry Pi lab instance, or using a web-based service such as AWS Cloud 9. While these approaches are perfectly reasonable, I wanted to find a solution for expanding the functionality of my Chromebook to support my professional development during self-study of new programming languages that didn’t rely on external equipment or even internet access. Fortunately, in the release of Chrome OS 69 last fall, Google delivered in a big way. Essentially adding Debian Stretch-based containers on top of Chrome OS, Project Crostini hit the ground running and has been actively improved with each subsequent stable release of Chrome OS. At this point, I feel it’s safe to say that Crostini will be a solid feature of Chromebooks for the foreseeable future and we can start enhancing our already wonderful user experience with these machines.
The first step is to ensure that you have a compatible Chromebook. While it seems that some devices may never be supported, the odds are in your favor with more recent models. For reference, I am using an Acer Chromebook R11 purchased in late 2015 and haven’t had any issues thus far.
Once you’re sitting with a supported model, you’ll want to navigate to your settings (chrome://settings) and enable the “Linux (beta)” option to turn on Crostini.

After a minute or two, you should be able to access a new Terminal app in your Launcher.


First up, you’ll want to run some maintenance to get your ducks in order:
sudo apt-get update
sudo apt-get upgrade
Next, let's go ahead and set up a couple of languages. I'm getting PowerShell Core here:

# Install system components
sudo apt-get install curl gnupg apt-transport-https

# Import the public repository GPG keys
curl https://packages.microsoft.com/keys/microsoft.asc | sudo apt-key add -

# Register the Microsoft Product feed
sudo sh -c 'echo "deb [arch=amd64] https://packages.microsoft.com/repos/microsoft-debian-stretch-prod stretch main" > /etc/apt/sources.list.d/microsoft.list'

# Update the list of products
sudo apt-get update

# Install PowerShell
sudo apt-get install -y powershell
With our Debian build we get Python3, but for a reason unknown to me, pip is not installed by default. We’ll need this for the VS Code Python extension, so let’s remedy that:
sudo apt-get install -y python3-pip
You can install packages with pip now:
pip3 install package_name
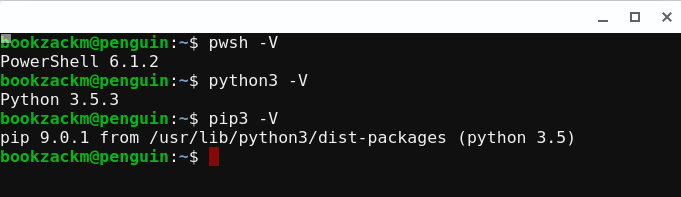
To validate, you can check installed versions of PowerShell, Python, and pip by calling the -V parameter on each.
So, we now have a Debian VM environment on our Chromebook with PowerShell Core, Python 3, and pip all ready to take over the world and build the next Skynet, right? Almost. First, we’re going to want to grab that beautiful new ISE that we’ve been discussing so we have a nice GUI to ease our Windows-addled mind into the Linux-verse with.
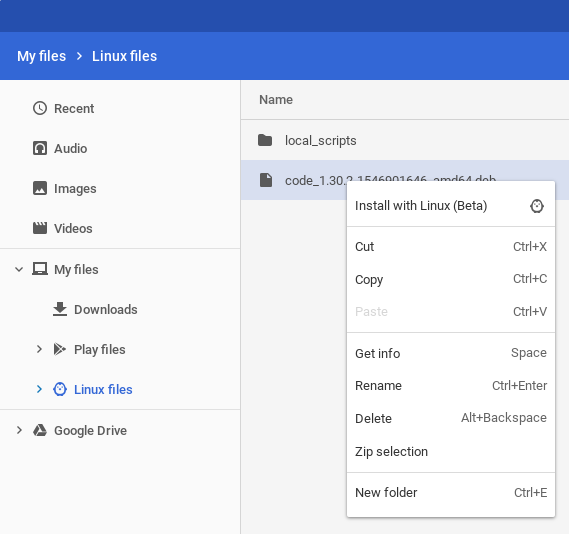
Go ahead and download the latest .deb x64 package for VS Code and drop it in the handy-dandy “Linux Files” directory in the Chromebook’s native file explorer. This folder redirects to your home drive in the Linux VM.

From here, you can either install the package via the terminal session, or you can right-click the package in the file explorer and select the “Install with Linux (Beta)” option for a direct installation with no fuss. Did I mention how wonderful the UX is on Chromebooks?
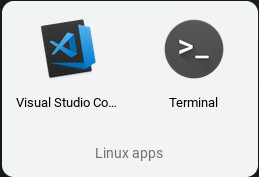
You should now have a VS Code app installed and available in your Launcher.
Now you’re ready to go forth and conquer. Before leaving for your adventure, I’d suggest installing the PowerShell and Python extensions to take advantage of the full capabilities of the ISE. And don’t forget the Settings Sync extension to help ensure that you have a smooth transition between your various workstations and operating systems.
And that’s it! I hope this helps you with solving your next great challenge. I’m always looking for new settings and extensions for VS Code. Feel free to reach out to me @zackm with any ideas!
Leave a Reply